These Zoo Photography Tips are worth learning.
These are the top tips for Zoo Photography that everyone should know:
Mixing out the Fence
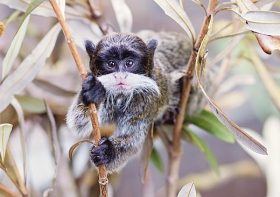
This is the most important tip for zoo photography. The majority of animals are kept in fences, especially monkeys and small animals. Even larger animals are often fenced in, even in larger enclosures.
It can be not easy to photograph through a fence, especially if it is thick. It is impossible to blend or avoid the fence if an animal is very close to it.
You can use these tricks to capture a clearer image of birds or animals in wired enclosures. However, it may not always be possible.
These are 5 tips to blend the fence in zoo photos:
- Move very close to the fence. Use manual focus to ensure that your camera doesn’t focus on the fence. Lenses can have trouble focusing because the fence is between them. You can make the fence disappear in an image by doing this.
- You can shoot through gaps and deal with wider fences more easily.
- The widest aperture available, preferably f2.8, will allow you to blur the fence in your foreground. This is also true for distracting backgrounds such as habitat enclosures, feeding containers, etc. Any fences that may be visible in the background.
- You can also eliminate distractions by using longer focal lengths and wider apertures. Zoom in at a distance if possible, or zoom in as close as you can with shorter focal lengths for blurry backgrounds and foregrounds.
- If you have fences visible in the image and need to save them, you can use the cloning tool within your post-processing software.
Photography Through the Glass
When it comes to photographing zoo photos, the most difficult is through the glass because you have to deal with reflections, oily marks, and scratches. Many glass enclosures have a colour cast that must be dealt with in post-processing.
How can you avoid these unwanted reflections?
To remove any oily or dirty smudges, first, find a glass area with fewer specks.
To reduce glare, wrap a black cloth or lens hood around the lens’ front. Your lens must be in direct contact with the glass. To reduce glare, tilt your lens at an angle that eliminates or minimizes glare and then take the shot. If focusing is difficult, you may need to increase the ISO setting by 400 to 1000.
Wait for the action to happen:
Photography wildlife requires patience and observation skills. It would be best if you also were ready to capture the moment. One of our top zoo photography tips is to understand the behaviour of different species of animals so that you can anticipate what to expect during certain moments.
Feeding time can be a great time as you get to capture the animals in their natural behaviour. You might also find some hilarious moments.
You can visit the zoo several times to get to know them better. Also, you will likely get better photos with each visit.
When to Visit:
It is best to go early in the morning when the zoo opens. This is because the crowds are smaller, and the animals are more active. The light will also be better. The animals will be tired later in the day and sleep in places away from noises and disturbances caused by humans.
Sometimes animals can be quite active right before sunset. This is a great time to get great shots using the beautiful golden light.
What if All Other Things Fail and You Are Caught with The Crowd?
Zoo photography tips 101: Make the most of your situation! There are many opportunities to capture candid shots that show human-animal interaction. Having children in the frame can be very interesting if the area allows them to feed the animals. It is possible to capture both human and animal reactions in the frame.
You will also notice that most people are excited to see the animals, and some enjoy watching the animals perform. Humans can also display humorous reactions to animal behaviour. These moments can bring a smile to anyone’s face if you can stand back and capture them.
Don’t Forget To Bring A Tripod Or A Monopod.
You may need a tripod, or at minimum, a monopod depending on how long you plan to spend at the zoo. Be aware that not all zoos allow monopods or tripods. You will need to confirm this with them before you go. You might consider alternatives to tripods. This article shows you how to stabilize your camera without a tripod.
Now that you know what to expect and how to handle certain issues in a zoo. Let’s look at the gear you need to take stunning zoo photos.


Leave a Reply