Zoo Photography Tips
My partner and I have been to many zoos over the past few years and have taken hundreds of photos of zoo animals. While we used different DSLR cameras during this time, such as a Nikon D40 and Canon 400D, Canon 5D Mark 11, and Canon 5D Mark 11, our basic techniques for photographing animals at zoos remained the same.
Photographing zoos requires that a photographer uses a DSLR to capture the many problems that might arise, such as:
- Distance between the photographer the animal.
- Glass windows and cages surround the enclosures.
- The animals’ movement.
- Lighting can be tricky. Most zoos close in mid-morning. The lighting can be difficult when you get to the animal and have your camera set up. This is especially true if the enclosure has both shade and light.
- Visitors and other photographers. It is not always possible to have an entire area for setting up a tripod, etc.
These problems can be solved by both the equipment and the technique a photographer uses on a given day.
What equipment do you need to take zoo photographs?
A long zoom lens is necessary to capture good photos at the zoo. A long zoom lens has a focal length of at least 100mm. You’ll often find yourself shooting between 200 and 300mm focal length in many cases.
My partner takes photos with a Canon EF 70-30mm f/4-5.6 IS USM lens. This lens is great for almost all situations.
Monopods or tripods?
When it comes to photography at zoos, there is often confusion about whether or not to use a monopod or tripod. Yes, animals in darker enclosures might require a slower shutter speed to let more light into the shot. This will also increase stability. In these situations, I would recommend increasing the ISO to 800.
Some photographers are more skilled than me and would argue that you can use a tripod to increase the ISO. For zoo photography, I don’t recommend using tripods.
You can increase your ISO to 1200 with a DSLR camera equivalent to a Nikon D300 or Canon 5D. This will still produce a high-quality image.
Monopods are a good option for entry-level DSLRs that can’t afford to increase their ISO. While taking up less space, Monopods are still useful for other visitors.
Lens Hoods
Lens hoods are useful for situations where you don’t have the option of choosing which angle to shoot from. Sometimes you will need to shoot directly into the sun. These situations may call for lens hoods to stop sun flares.
Tips for beginner zoo photographers
Let’s now get into the technical aspects of zoo photography. Here are our top 10 tips to take great photos at the zoo. Plan your day –
Grab a map as soon as you arrive at the zoo. Plan out which animals and when you will be there. The best time to see animals is right before their feeding times when they are most active.
2. Animals should be treated as living subjects.
My camera settings are set to shutter priority mode and fast shutter because many animals move around at feeding times. On the other side, my partner has his camera set to Aperture Priority mode with continuous shooting.
For entry-level DSLRs, another way is to use sports mode. This will allow you to take a series of photos, one after the other so that you never miss a shot.
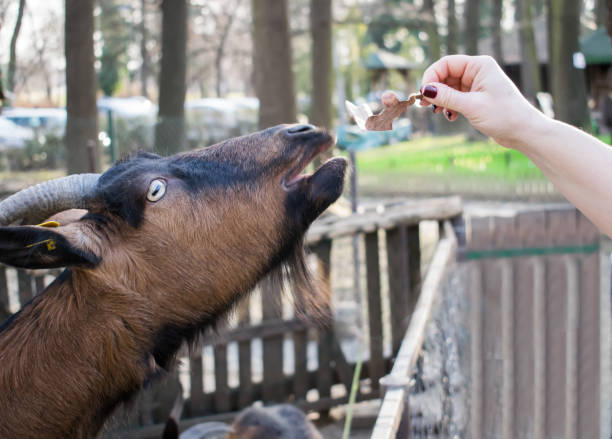
3. Eliminate cages
Photographers at zoos will find it frustrating not to be able to capture the animal through its cage. This can be done by zooming your lens to a longer focal distance and placing the focal spot directly on the animal. In most cases, this should eliminate the cage.
4. Eliminate Glass –
Glass can be eliminated in the same way as cages. There are some other ways to remove Glass. You can wipe the glass with a cloth or position yourself so that there are no scratches between you and the animal.
5. Take a closer look, and then crop the images.
Take the time to browse the shop when you get to the zoo. Pay attention to the postcards and posters being sold. Well-cut faces and body parts are more effective than those in a spacious environment. This allows you to capture details that may not be visible otherwise.
6. Concentrate on your eyes.
As with all living things, sharp eyes can cause a loss of connection between the subject (and the viewer) and the observer. Animals are no different. Photograph everything you see in a zoo.
7. If possible, get down to (or up to) the animal’s level.
This means you have to be on your knees or in the dirt. Sometimes, you may need to sit down. Your images will have more impact if they are close to your animal.
8. Be patient
Allow yourself plenty of time to visit each enclosure. This is something my partner excels at. I don’t know how many times I have walked away from an animal only to return with him taking the perfect shot of it starving, yawning, or showing its teeth in hunger.
9. Remove backgrounds wherever possible
A fence or bucket in the background is distracting and can ruin a zoo photo. Keep the main focus on your animal whenever possible. This is often done by moving away from distracting objects or using aperture mode (set at a small F-number) to smoothen the background.
10. Photography and its enjoyment
It would be best if you visited the zoo to enjoy the experience of seeing the animals. Don’t forget to capture human pleasure. These images will smile on your face when you look back at your photos at the end of each day.


Leave a Reply